クイックスタート
このページでは、製品を使い始めるためのいくつかのステップをご案内します。
1. Arturia Software Center(ASC)をダウンロードしてインストールします
Arturia Software Center (ASC) では、Arturiaバーチャルインストゥルメントのアクティベーション、インストール、アップデートをコンピュータ上で行うことができます。
Arturiaの他のソフトウェアのデモ版だけでなく、お持ちのソフトウェアにもアクセスできます。
2. Arturia Software Centerにログインします。
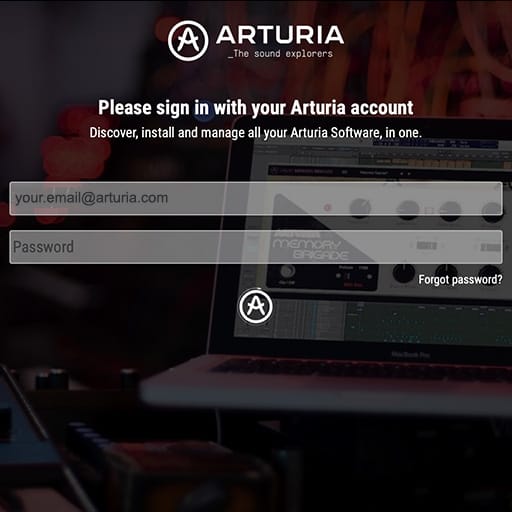
My Arturiaアカウントと同じメールアドレスとパスワードを入力します。
その後、製品ライセンスがメインパネルに表示されます。
My Arturiaアカウントをお持ちでない場合は、「Create Account」(アカウント作成) をクリックし、表示される手順に従ってアカウントを作成してください。
オフラインのコンピュータをお使いの場合は、以下に記載の手順で行えます:オフラインの場合
Arturiaウェブサイトでソフトウェアのライセンスをご購入の場合、自動的にアカウントに登録されます。そうでない場合は、メイン画面の上部にある「Register a new product」(新しく購入した製品を登録する) ボタンをクリックしてください。
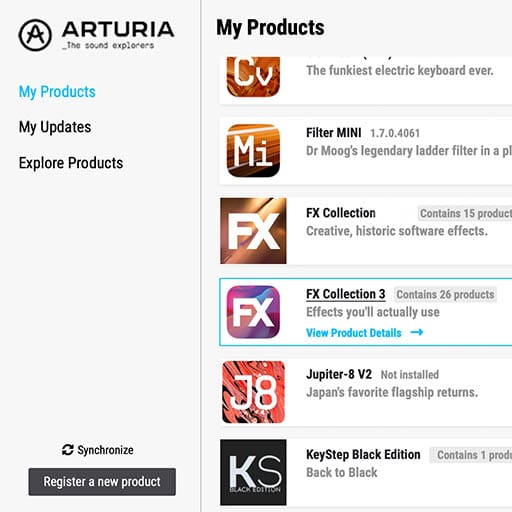
3. ASCで製品をインストールし、アクティベートします。
リストの中からお使いの製品を探し、「Install」(インストール) ボタンをクリックすると、サイレントインストールが始まります。
初回に保存先フォルダを設定するよう求められます。
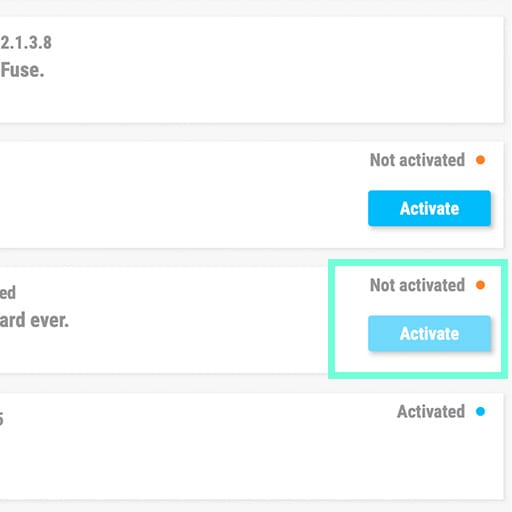
アクティベートされるまで、製品はデモモードのままです。
「Activate」(アクティベート) ボタンをクリックします。これで新しいソフトウェアがアクティベート (有効化) されます。
これで、同時に5台までのコンピュータに制限なく使用できるようになります。他のコンピュータでもこの操作を繰り返してください。
4. Launch Your Product
Your product is not available as a standalone software.
It must be used in a DAW (Digital Audio Workstation).
Click on the icons to see how to select and use your new effect in the most popular DAWs:
Discover, experiment, enjoy!
 ABLETON LIVE
 BITWIG
 CUBASE
 FL STUDIO
 LOGIC PRO X
 PRO TOOLS
 STUDIO ONE
 Digital Performer
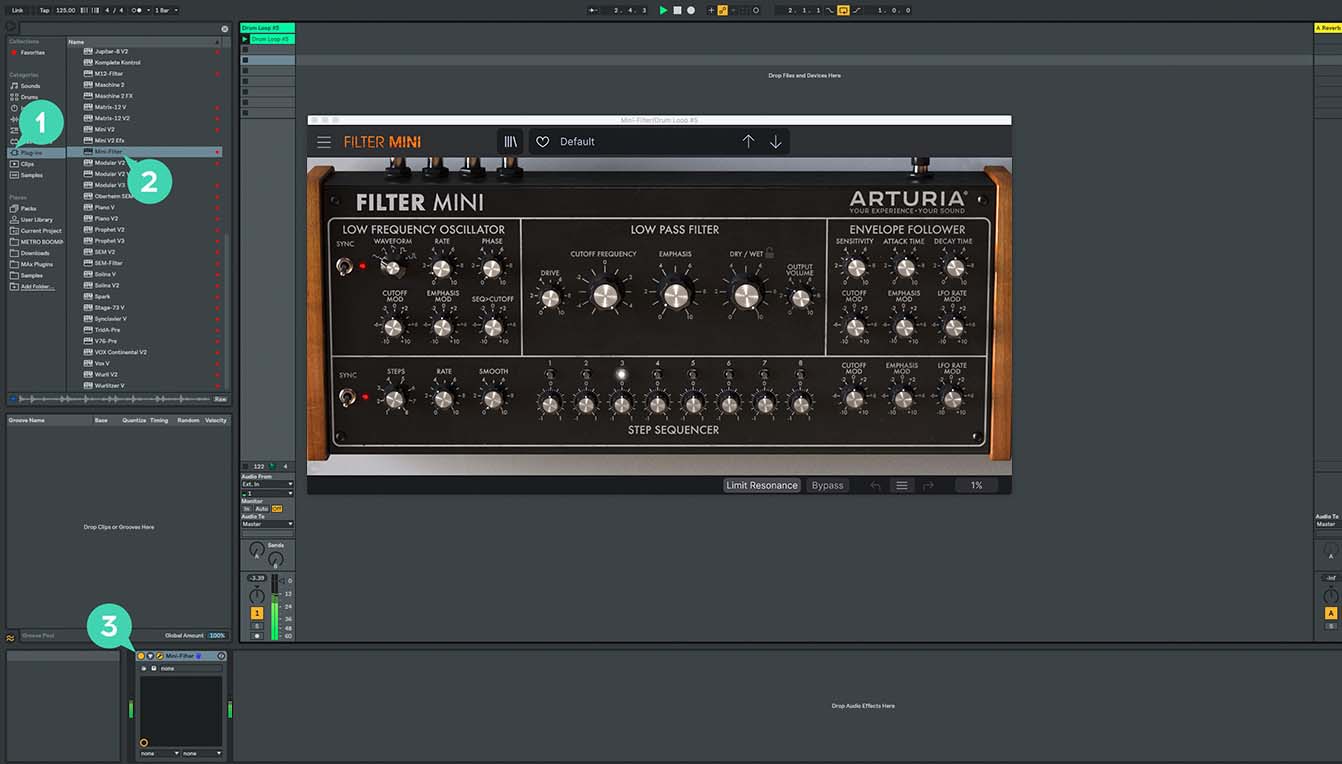
For Ableton Live
1/ Open the Live browser, and click on the 'Plug-ins' section.
2/ In the VST or Audio Unit* folder, browse the virtual effect of your choice.
3/ Drag & drop it in your track or FX return.

For Bitwig
1/ In Bitwig browser, select the devices section and click on the category tab.
2/ Select the Arturia category.
3/ On the bottom of the browser will appear the available Arturia devices.
4/ Drag & drop the virtual effect on your track.
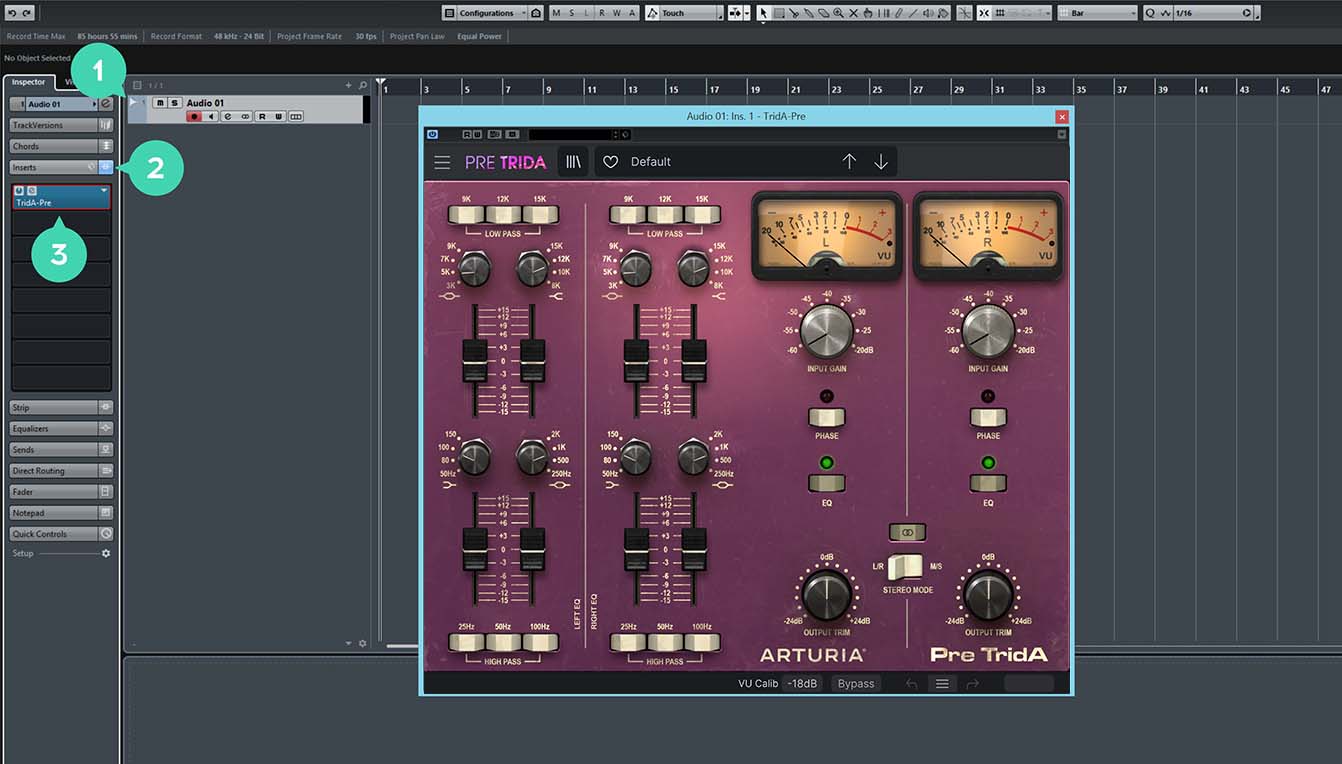
For Cubase
1/ Select a track
2/ In the Inspector, open the Audio Insert tab
3/ Click on an empty slot and select the virtual effect of your choice
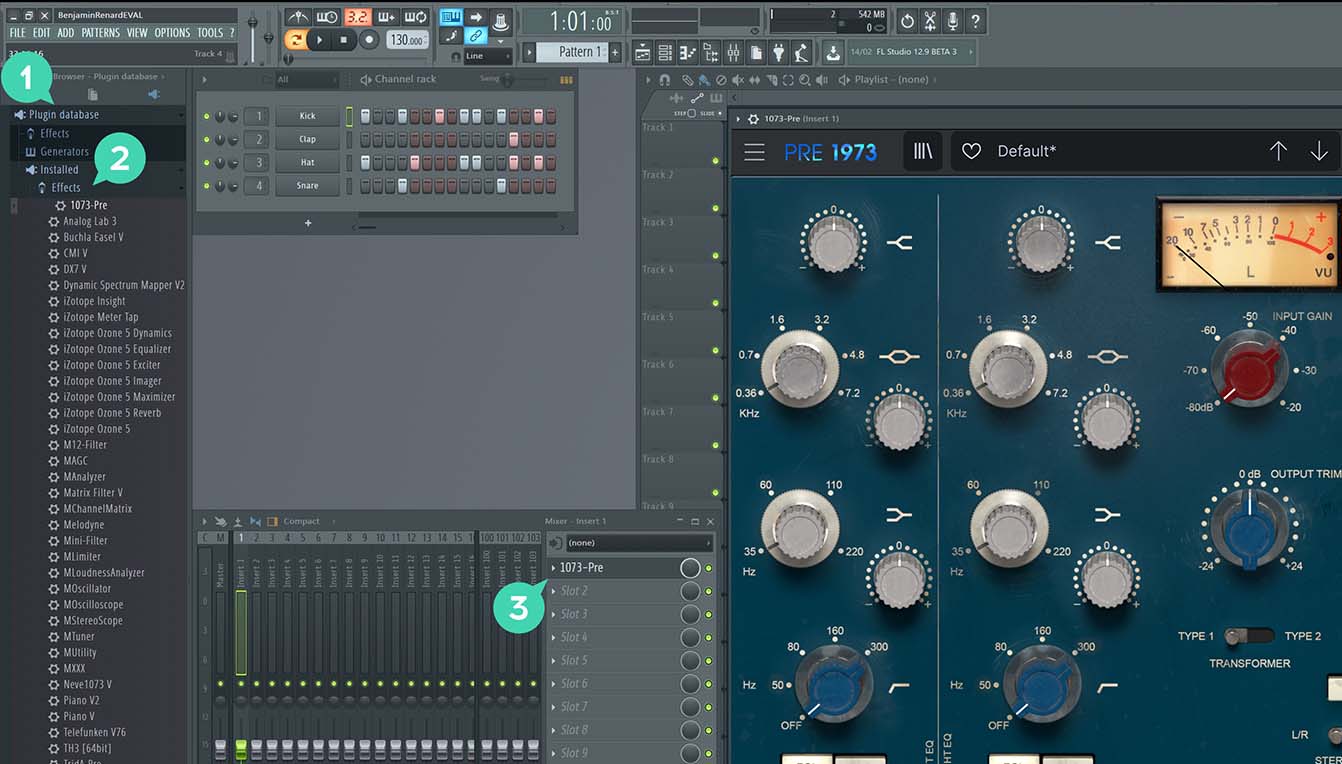
For FL Studio
1/ In FL Studio browser open the Plugin Database folder.
2/ in the Effect section, select the effect of your choice.
3/ Drag & Drop it in one of your mixer effect insert.
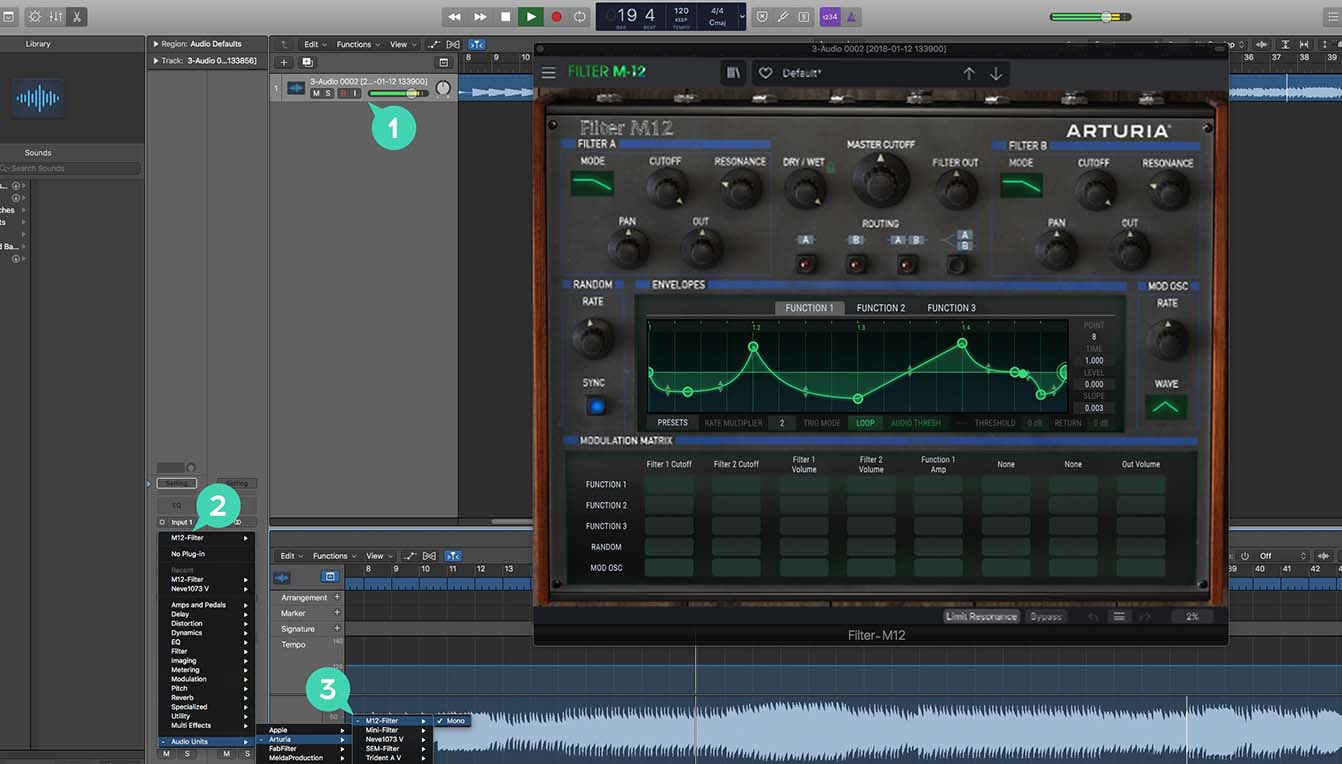
For Logic Pro X
1/ Select a track, or a bus.
2/ Under Settings, EQ & Input, click on the Audio FX tab.
3/ In Audio Units > Arturia > Select the virtual effect your want to add.
More info here
For Pro Tools
1/ Select a Track.
2/ Click on one of the Inserts A-E tabs.
3/ In multichannel plug-in > Effect select the virtual effect of your choice to add it to your insert.
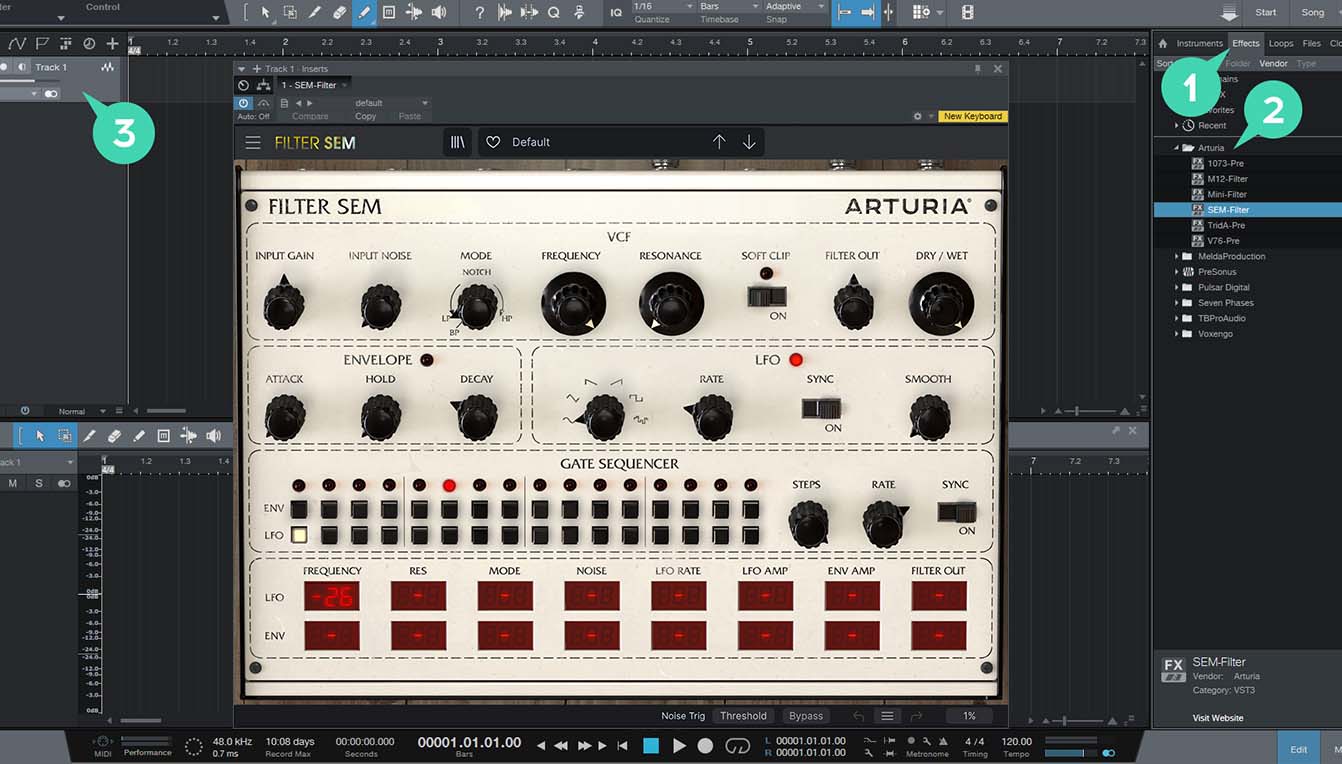
For Studio One
1/ Go the the browser on the right and click the Effects Tab.
2/ Open the Arturia folder and locate the virtual effect your want to use.
3/ Drag & Drop it on your track.
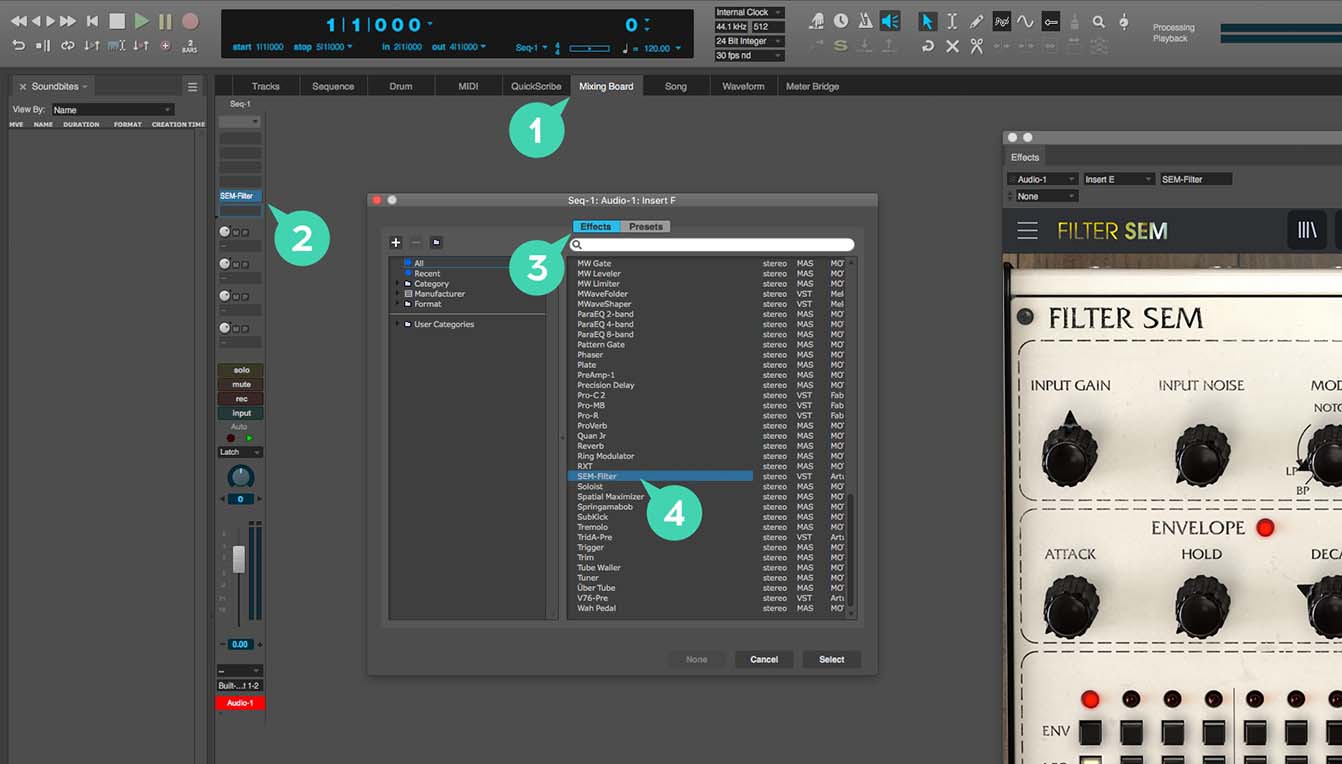
For Digital Performer
1/ Go to the Mixing Board Tab.
2/ Select a track, and on the top of it, click one of the empty inserts slots.
3/ Open the effect Tab.
4/ Select the virtual effect of your choice and click select to add it to your track.
チュートリアル
オーバービュー
Arturiaの多彩なユニゾン・エフェクトのガイド・ツアー
このチュートリアルでは、リフレクション・パスウェイやエフェクト・モード、フィルターやモジュレーションのパラメーターなどを含む、Efx REFRACTのマルチエフェクト機能をLenaがご紹介します。シンプルなコーラスから壮大で広がりのあるディストーションまで、パッド、ボーカル、シンセ、ドラム、そしてマスター・トラックにユニゾンのを効果的に活用する方法を学ぶことができます。
インストーラー & マニュアル
Bus PEAK
マニュアル
| 氏名 | 日付 | サイズ | バージョン | ダウンロード |
|---|---|---|---|---|
Jun 10, 2024 | 21.47 MB | 1.0.0 |
Arturia Software Center
ソフトウェア
| プラットフォーム | 氏名 | 日付 | サイズ | バージョン | 情報 | ダウンロード |
|---|---|---|---|---|---|---|
Feb 11, 2025 | 59.8 MB | 2.9.2.2901 | ||||
Feb 11, 2025 | 29.56 MB | 2.9.2.2901 |